
Overview
In this resource, we discuss the teaching and learning of measurement. We highlight important aspects of teaching measurement topics to children and address the main stages of understanding that students go through when learning what it means to measure a specific attribute (e.g. length, volume, etc.). Along the way, we examine areas that students often struggle with and make suggestions for how to support students in understanding them.
Important Aspects of Measurement
Measurement is one of the most practical topics in the elementary school mathematics curriculum. In the K-5 CCSS, students are expected to learn the following measurement attributes: length, liquid volume, elapsed time, mass (weight), area, volume, and angle. When discussing teaching and learning of measurement, we need to keep in mind there are three different (yet clearly related) aspects that students must learn. They are:
- Understanding the attribute being measured (e.g. what is length?)
- Understanding the process of measurement (e.g. how do you describe how long something is?)
- Learning how to use measuring instruments (e.g., how do you use a ruler?)
The Four Stages of Measurement
There are typically four stages to the teaching and learning of each measurement attribute: (1) direct comparison; (2) indirect comparison; (3) measuring with arbitrary (non-standard) units; and (4) measuring with standard units. In the CCSS, these stages are explicit in teaching and learning of linear measurements in Kindergarten through Grade 2. However, students need to experience these stages with all measurable attributes even though they may spend less time on some stages as they gain more experiences in measurement. For example, when students learn about volume of solids in fifth grade they will likely spend much less time on the first three stages compared to what they did when they learned about length. Still though, it is still important for students to go through these stages so that they can build their understanding of what volume is, the process of measuring it, and how to use the tools to do so.
Stage 1: Direct Comparison
So, why is it important to follow these four stages as we begin our instruction on measurement? The major focus of the first two stages is to help students understand the attributes that are being measured. After all, before we can measure anything, we really need to understand what it is that we want to measure. For example, before we can measure length, we need to understand what length is. By putting two objects next to each other (direct comparison), students can determine which is longer and which is shorter. Through such experiences, students gain the understanding that length is the amount of space between the two ends of an object. (Although we may use different words, “height” is not really an attribute. It can be thought of as length in the vertical orientation.) Of course, through direct comparison activities, students are gaining some fundamental understanding about how to measure an object as well. For example, when comparing the lengths of two objects, it is important that one end of the objects must be lined up.
You cannot say the segment on top in the figure below is longer just because it “sticks out” farther to the right.

Students will also learn that the “amount of space” we are interested in is along a straight path. Thus, we cannot simply compare the positions of the end points as shown in the figure below.
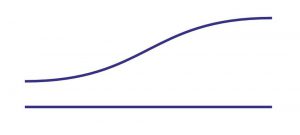
Before we can compare these two objects, the end points of the second object must be arranged in a straight line. These learnings are fundamental to a child’s understanding of measurement.
Stage 2: Indirect Comparison
Unfortunately, it is not always possible to directly compare two objects. In situations where it is not, it is sometimes useful to use a third object that can be compared directly to each of the two objects and act as a reference between them. For example, if one doorway is wider than your arm span but another doorway is narrower than your arm span, you know that the first one is wider than the second one. Indirect comparison provides more flexibility as you compare two objects. It also provides opportunities for children to experience an important mathematical property of relationships called transitivity. This property states that if a > b and b > c, then a > c. Of course, the formal study of such property will not take place until much later.
Stage 3: Measuring with Arbitrary (Non-Standard) Units
Perhaps a more important reason to teach and learn indirect comparison is that it sets the stage for the most fundamental idea about the measurement process: the use of a unit. When using a third object to indirectly compare, its quantity may not always be in between that of the original two objects. For example, a wooden stick may be much shorter than both of the two doorways. In those cases, however, it may be possible to determine that one doorway is taller than three (of the same) wood sticks put end to end while the other one is shorter than three wood sticks. Now, we can say that the first doorway is taller (longer) than the second one.
You can easily see that such experiences become the foundation for the idea of expressing an attribute in terms of the number of a third object, unit, necessary to “cover” it. When we move into this stage, we are now indeed “measuring” in the sense that we are assigning a number to an object in terms of how much of the attribute it has. There are many merits for expressing the amount of an attribute using numbers. Clearly, it simplifies the process of comparison as we no longer need to find different objects to use as the reference — comparison of multiple objects can be easily done by simply comparing numbers of one established unit. Another important advantage to assigning numbers to attributes is that we can answer not only “which is longer?” but also “by how much?” In general, once we express the amount of an attribute with numbers, arithmetic operations may be used to answer more complex questions. Although the CCSS does not explicitly state these merits, I hope teachers help students experience and understand them.
Why Teach Students to Use Non-Standard Units?
Some people may argue that, once we get to this stage, we should just use standard units. This argument perhaps makes sense later in the elementary grades after students have learned about measuring three or four different attributes. However, at the primary grade level, it is important to keep in mind that students are still learning about the process of measurement: pick a unit, then determine how many iterations of the unit is necessary to equal the object’s attribute that you are measuring. For us, this is so obvious, but not so with children. Introducing standard units at this stage will require children to deal with two new ideas simultaneously — new units and a new process. There are also other considerations. First, some units may be too small or too large so that the size of the resulting numbers may not be appropriate for children at this particular time. By using non-standard units, teachers can control the range of numbers students might obtain. Also, it is important to note that measuring with standard units typically means measuring with various instruments. For example, if you are measuring with inches, you are most likely to be measuring with a ruler. However, learning to use a ruler, or any measurement instrument, is also a challenging task in and of itself — this might be a third new idea students have to grapple with if we are introduce standard units without having taught non-standard units.
Stage Four: Measuring with Standard Units
Although it may sound a bit paradoxical, the use of non-standard units is a useful experience for children to understand the need for having standard units. For example, if two students measure the width of the same doorway using their pencils, they may get different results. This type of experience will allow them to see that they cannot compare numbers unless their units are the same. This is when we can introduce the idea of common units, then finally the idea of standard units such as inches, feet, centimeters and meters.
Teaching Measurement Tools
Finally, learning how to measure with common instruments such as rulers is not as simple as adults might think. Because of this, it may be useful if children had some experiences using their own measurement tools. For example, during the third stage (measuring with non-standard unit), students can tape together index cards to form their own measuring “tape.” Initially, students may count the number of index cards every time they measure an object, but eventually they may realize labeling the cards 1, 2, 3,… would make it easier. The figure below shows the evolution of a student-constructed “ruler.”
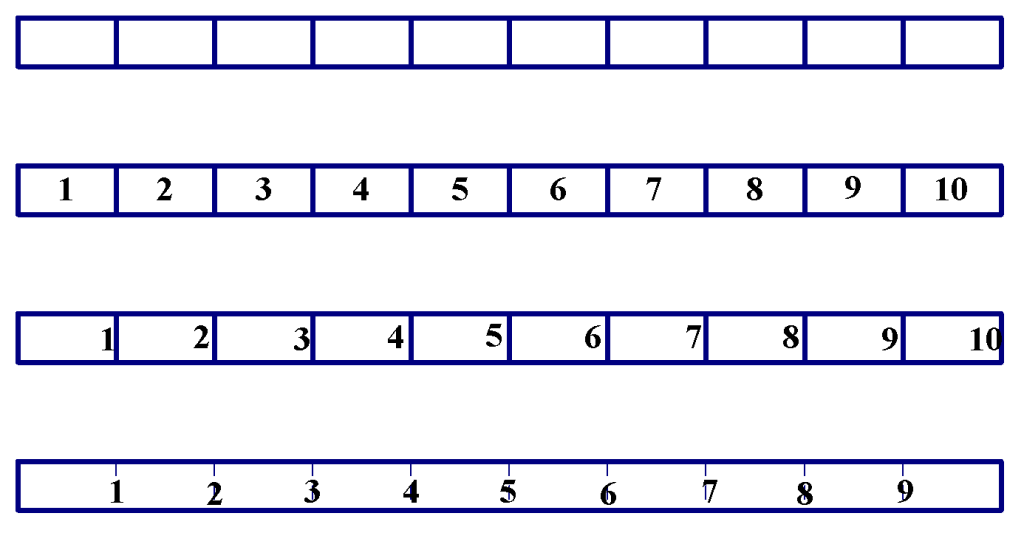
Such experiences will allow students to understand that what we are counting on a measurement tape is the number of spaces between the tick marks, and the numerical label at a given tick mark indicates the total number of units up to that mark. Furthermore, as we learned in the first stage, the end (actually the starting point) of the measuring tape must be lined up with the end of the object, rather than the tick mark on the measuring tape labeled “1.” A variety of home-made measuring instruments can be made to measure length, capacity/volume, weight, and even angles. Making and measuring with student-made instrument may be a very fruitful experiences as students learn to measure with standard units.
Discussion Questions
After reading this resource, it may be helpful to discuss the following questions as a team.
- What ideas about teaching-learning measurement discussed in this essay strike you as important in your setting?
- How does your curriculum handle the topic of measurement? What about it do you like and/or notice that has opportunity for improvement?
- What experiences have your students had that currently inform their understandings of measurement?
- What makes it difficult for students to progress through each of the four stages of measurement?
- From direct to indirect comparison
- From indirect comparison to non-standard units
- From non-standard to standard units
- What do you want to learn more about?
Next Steps
This concludes our overview of teaching and learning measurement. Our resources below include more specific information on the measurement attributes covered in the CCSS, and are meant to support a deeper look at your area of focus.
Sub-Topics
See the Resource tiles below for expanded discussions on a selection of sub-topics related to measurement.
